Read FlexBox before Centering a Div inside another Div
Flexbox , Main-Axis alignments , Cross-Axis alignments, Sizing, justify-self makes no sense, flex-direction , flex-wrap , Ordering

FlexBox is another way to layout the element in CSS. It contains a parent element (i.e. container ) which contains elements (that are items of that container ) It has many versions like box , flexbox , flex etc. But we will be using flex as it is latest and most used among all of them.
Without Using Flex
By using Flex

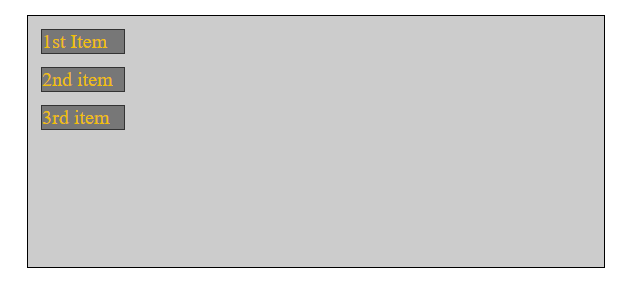
In order to start using FlexBox , we will be using display:flex property inside that container
<body>
    <div class="container">
      <div class="item item1">1st Item</div>
      <div class="item item2">2nd item</div>
      <div class="item item3">3rd item</div>
    </div>
  </body>
* {
  margin: 3rem;
}
.container {

  display: flex;

  height: 200px;
  background-color: #ccc;
  border: 1px solid black;
}

.item {
  border: 1px solid #333;
  background-color: #777;
  width: 65px;
  color: rgb(237, 191, 7);
  margin: 10px;
}
Arranging Items Horizontally (along Main axis)
Using justify-content
By default it is set to flex-start , but we have many other options like flex-end , center , space-between ,space-around , space-evenly
Before using justify-content
After using justify-content
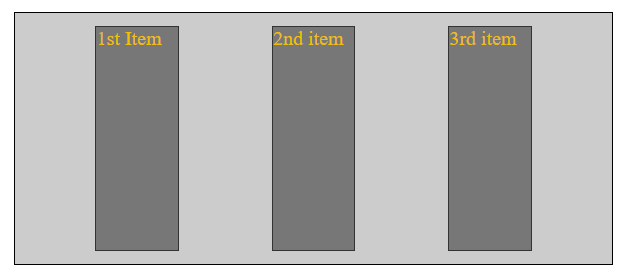
.container {
  justify-content: space-evenly;
}
flex-start places the items to the leftmost side.
flex-end places the items at rightmost side.
space-between places items far apart from each other such that there is a maximum space between them.
space-around places items in such a way there is half the space before & after first and last item.
This space is always half of the space betwen two items placed there.
space-evenly places items in such a way such that there is same space everywhere between items inside the container.
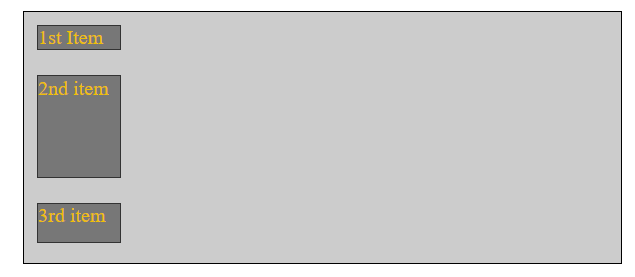
Arranging Items Vertically (along Cross axis)
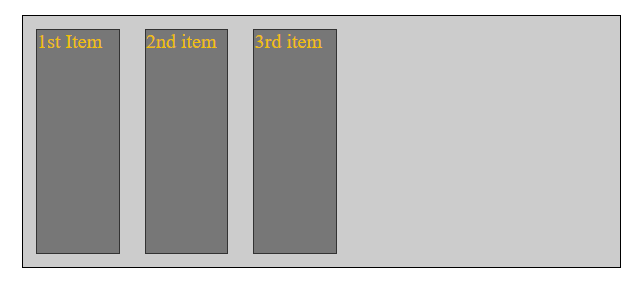
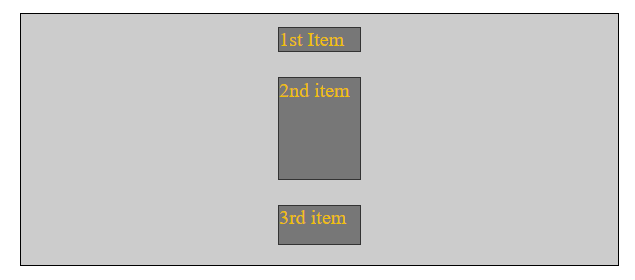
Using align-items
By default if we don't set any height to the Items then CSS applies align-items: stretch by default (i.e. initial value of height when we don't specify any height of item).
.item1 {
  height: 100px;
}

.item2 {
  height: 50px;
}

.item3 {
  height: 20px;
}
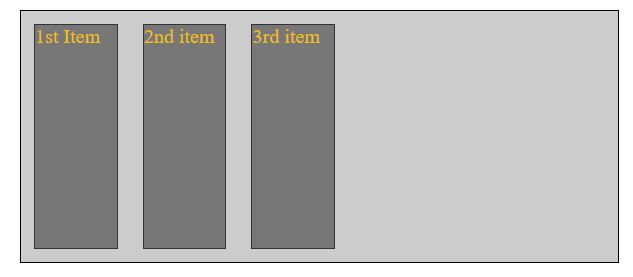
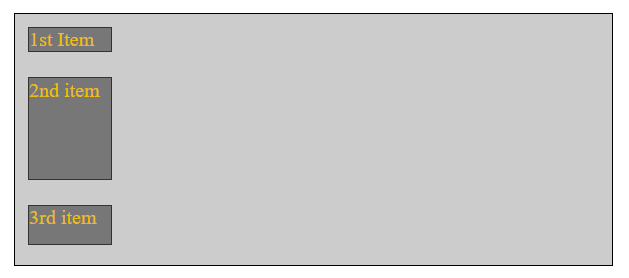
flex-direction
By default flex-direction is set to row. This means that its horizontal-axis is main-axis & vertical-axis is cross axis.
flex-direction: row

.container {
  flex-direction: row;
  align-items: stretch;
}

.item1 {
  height: initial;
}

.item2 {
  height: 80px;
}

.item3 {
  height: 30px;
}
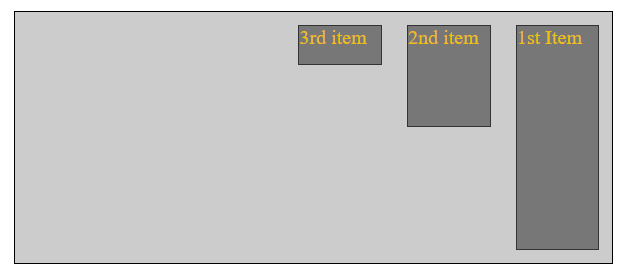
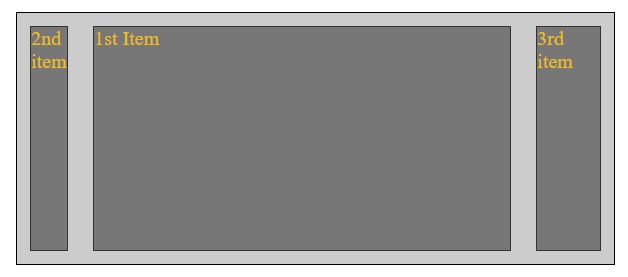
flex-direction: row-reverse
It will reverse the order of flex-direction:row.
.container {
flex-direction: row-reverse;
align-items: stretch;
}
flex-direction: column
vertical-axis is set to main-axis & horizontal-axis is set to cross-axis
.container { flex-direction: column; align-items: stretch; }
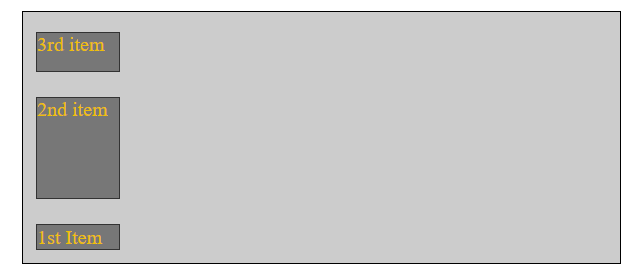
flex-direction: column-reverse
It reverses the order of flex-direction: column
.container {
flex-direction: column-reverse;
align-items: stretch;
}
Flex Sizing
This can be done with the help of this shorthand property.
 /*flex: flex-grow flex-shrink flex-basis ;*/
 flex: 1 0 10px ;
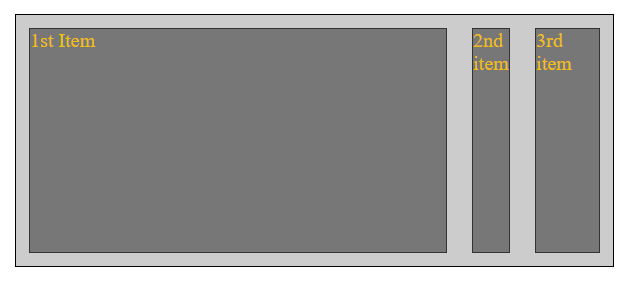
Before using flex-grow

After using flex-grow
 We can also use them individually. This property fills up the extra space remaining in the container .
First add this extra code to our previous CSS file we created in the start , after that I will explain how it works.
We can also use them individually. This property fills up the extra space remaining in the container .
First add this extra code to our previous CSS file we created in the start , after that I will explain how it works.
.item1 {
  flex-grow: 1;
}

/* Alternative way to select a item using pseudo-elements-selector */
/* If you don't know skip it before you learn this type of selector */
/* But they are easy, you can learn anytime */
/* I am using it for once just to show another method , I will used item1 , item2 , item3 class which I already defined in the HTML code */

.item:nth-child(2) {
  flex-grow: 3;
}
In above code we have used flex-grow two times and each contain a value of "2" (taken randomly).
So total empty area in the container will 1/4 times the part of item1 and 3/4 times the part of item2.It is divided by 4 as total of each flex-grow is "4" here.
flex-growwill only use available free space .
flex-basis
This tells how much space a item is containing in the container. It is by deafult using the width of our item. It is more useful when we have different size container but we want to grow them using flex-grow at the same rate .
If we take flex-basis: 0; then it will grow all items at the same rate .

.item1 {
  flex-basis: 0;
  flex-grow: 1;
}
.item2 {
  flex-basis: 0;
  flex-grow: 1;
}
.item3 {
  flex-basis: 0;
  flex-grow: 1;
}
No matter they can have any size .
and when we explicitly specifies any value inside any item class like flex-basis: 30% , then it will take up only 30 % size of the container. After that there will be less space avaialble for flex-grow .
Before using flex-basis
After using flex-basis
.item1 {
  flex-basis: 90%;
  /* 20% of the container will be used */
}
.item2 {
  flex-basis: 0px;
}
flex-shrink
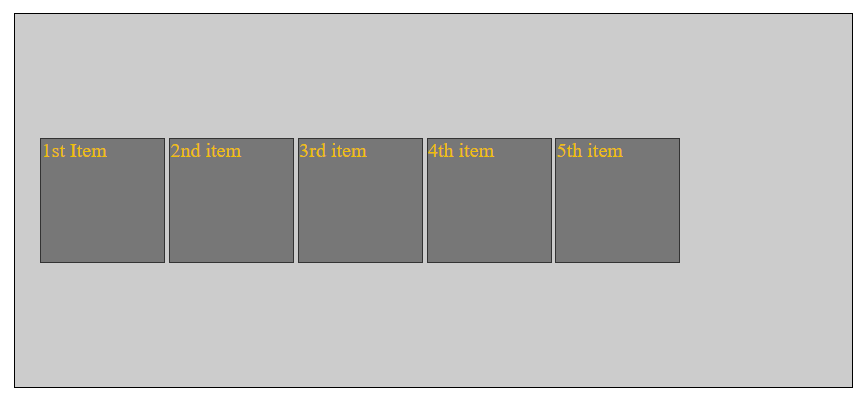
Before telling you how shrink works , first see this illustration In the given screenshot we have 3 items inside our container
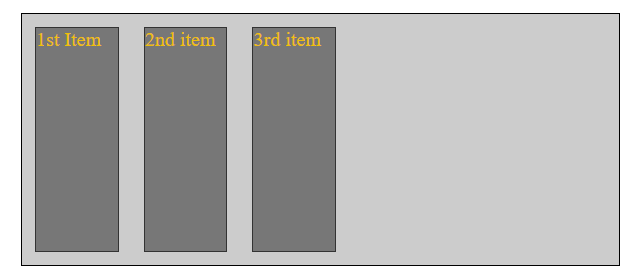
But if we increase the no. of items in our container , they shrink themselves upto a limit , to fillup and prevent overflowing from container. But this happens upto a limit.
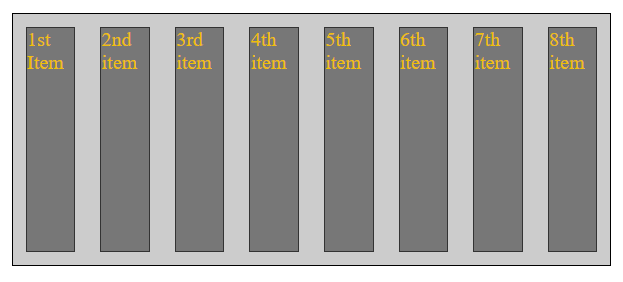
In the same container I added 8 items. But after a limit items start overflowing. Because these items can't shrink their size beyond its content-size.
Here text "Item 2" text is its content.

 <body>
    <div class="container">
      <div class="item item1">1st Item</div>
      <div class="item item2">2nd item</div>
      <div class="item item3">3rd item</div>
      <div class="item item3">4th item</div>
      <div class="item item3">5th item</div>
      <div class="item item3">6th item</div>
      <div class="item item3">7th item</div>
      <div class="item item3">9th item</div>
      <div class="item item3">10th item</div>
      <div class="item item3">11th item</div>
    </div>
  </body>
All this done using flex-shrink property . By default it is set to "1".
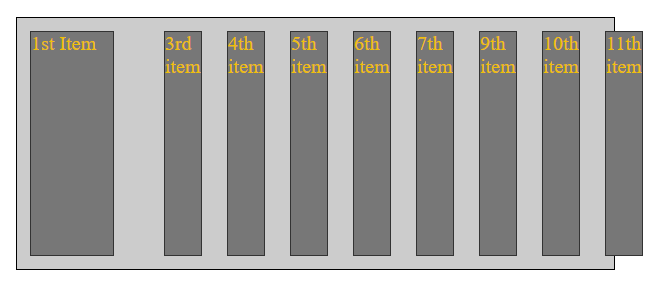
Suppose we are giving flex-shrink:0 to some item and some bigger values to another item and see what happens.
/* .item:nth-child(1) {
  flex-shrink: 0;
} */
/* Alternative to above code who doesn't know pseudo class selector properly */
.item1 {
  flex-shrink: 0;
}
.item2 {
  flex-shrink: 10;
}
item1 will not lose any part for overflowing space outside the container while item2 can lose 10 parts of oveflowing space . But it can't shrink befond its content size .
Item 2 contains a text content i.e. "Item 2" which will take some space.
Let try to remove this Item2 completely.
<body>
    <div class="container">
      <div class="item item1">1st Item</div>
       <!--   Item2 has no text content -->
      <div class="item item2"></div>
      <div class="item item3">3rd item</div>
      <div class="item item3">4th item</div>
      <div class="item item3">5th item</div>
      <div class="item item3">6th item</div>
      <div class="item item3">7th item</div>
      <div class="item item3">9th item</div>
      <div class="item item3">10th item</div>
      <div class="item item3">11th item</div>
    </div>
  </body>
.item1 {
  flex-shrink: 0;
}
.item2 {
  /* I have removed the content of Item2 */
  flex-shrink: 10;
  border: none;
}
flex-grow behaves different because it focuses on extra space left inside the container and will grow element according to their flex-grow value.
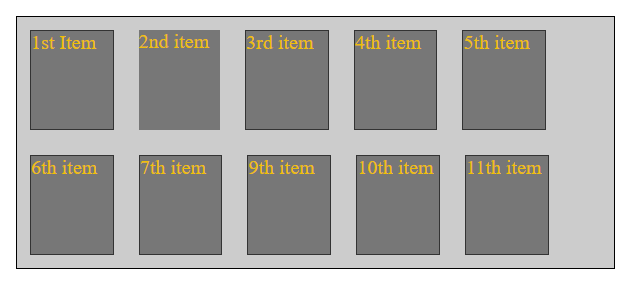
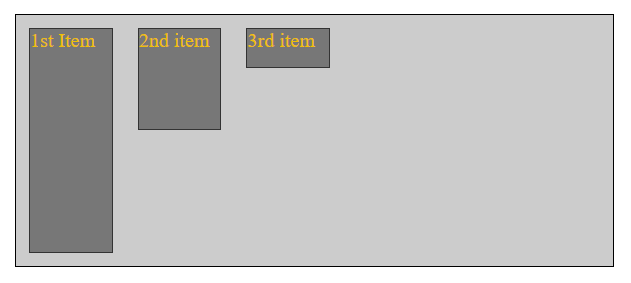
flex-wrap
This is used when there is an overflow of items and we want to placed them on a new line. To use this we have to put this code in our container class.
.container{
  flex-wrap: wrap;
}
 Whenever if it is already applied and we want to remove this ,we use this code
.container{
  flex-wrap: nowrap;
}
When we use flex-wrap: nowrap then align-items and justify-content property don't work.
This property works on a group of items or we can say works when it is wrapping things. It adds and control where the the extra space be placed.
By default flex-direction:row is set.
And when we change flex-direction:column , then it treats justify-content like align-items and vice-versa.
Before applying align-content
After applying align-content
.container {
  flex-wrap: wrap;
  flex-direction: column;
  align-items: flex-start;
}

.item1 {
  height: initial;
}

.item2 {
  height: 80px;
}

.item3 {
  height: 30px;
}
Set flex properties for particular item
We can do this by addingalign-self property in particular item CSS.
Before applying align-self property
After applying align-self property
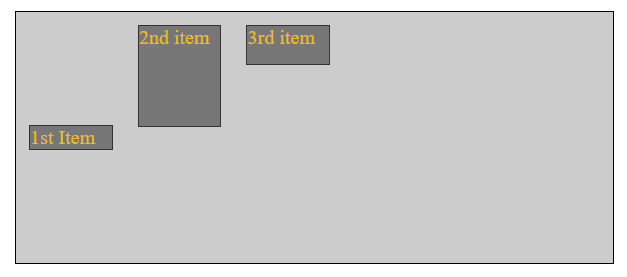
.container {
  align-items: stretch;
}

.item1 {
  height: initial;
  align-self: center;
}

.item2 {
  height: 80px;
}

.item3 {
  height: 30px;
}
justify-self doesn't make any sense in flexbox
When we use justify-content in our container then it adds extra spaces to the group of items.
For example if we use justify-content: flex-end , it means that we are adding extra space before our items (group of items). It control the extra how CSS will treat with extra spaces.
But justify-self property does not make sense in Flexbox as we are are moving groups of items and spaces , not the single item.
But align-self makes sense as we are adding extra space to that dimension(axis) which helps in moving our item from start to end.
Ordering Of Elements
By default as we move from top to down in the documnet flow , it asssigns an order number , which decides which will be executed first .
Lesser the order number will be , will be executed earlier .
It can even be a negative order number .
.item1 {
  flex-basis: 90%;
  /* 20% of the container will be used */
}
.item2 {
  flex-basis: 0px;
  order: -33;
}
But when we use TAB to traverse to different items , then the normal order (which was without order property) will be used.
gap property
We can directly give gap between two items like this
.container{
  gap: 10px;
}
Above code will give 10px gap to both rows and columns. We can specifically give gap to rows and column by using this code.
.container{
  row-gap:10px;
  column-gap:3px;
}
* {
  margin: 0;
  box-sizing: border-box;
}
.container {
  display: flex;
  margin: 3rem;

  height: 300px;
  background-color: #ccc;
  border: 1px solid black;
  align-items: center;
}

.item {
  border: 1px solid #333;
  background-color: #777;
  width: 65px;
  color: rgb(237, 191, 7);
  /* margin: 10px; */
}

.container {
  flex-wrap: wrap;
  /* gap: 0px;    */

  column-gap: 3px;
  row-gap: 10px;
}
.item:nth-child(1) {
  margin-left: 20px;
}
.item1 {
  height: 100px;
  width: 100px;
}

.item2 {
  height: 100px;
  width: 100px;
}

.item3 {
  height: 100px;
  width: 100px;
}
Comment if I have committed any mistake. Let's connect on my socials. I am always open for new opportunities , if I am free :P


